If you want to learn how to develop mobile applications, it is essential to understand the tools that will allow you that. Without the use of IDEs (Integrated Development Environment), it would be very difficult to create apps for your Android device, because you would have to deal alone with the organization of the directory structure, creating layout files, compiling of source code and configuring even more complex processes such as the generation of an APK (Android Application Package), which just the looks of it makes me lazy.
Android Studio is the new IDE for developing Android applications using the Gradle build system. In this post we will show you a step by step installation, the directory structure of a project, an introductory idea about the function of Gradle and locate some basic, but essential, functionality, in Android Studio.
- Installing Android Studio
- A brief overview of the Android Studio graphical user interface
- Understanding the directory hierarchy of a project
- What is Gradle
- Extras
Installing Android Studio
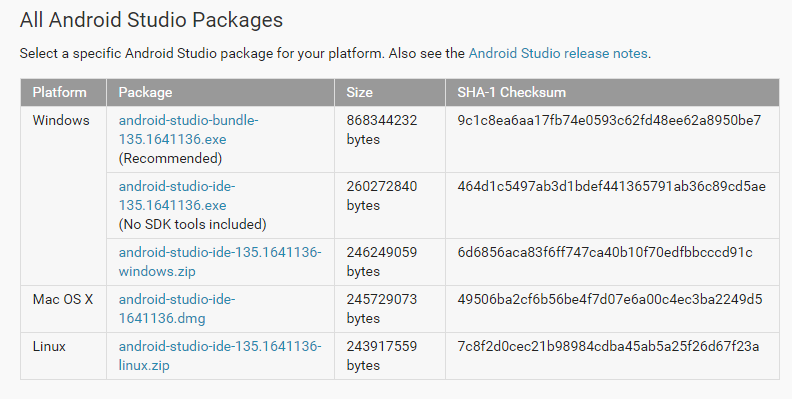
The Android Studio installer can be found here. The page automatically detects your operating system and already provides the appropriate link. If you notice it can’t detect properly, you can download it from the links at the bottom of the page in the All Android Studio Packages section.
Windows
Download the installer and wait a while. There are about 828 MB. When finally the download finishes, run it and allow the installer to make the appropriate changes to the system. You’ll have a sequence of screens where you’ll basically click Next.

.
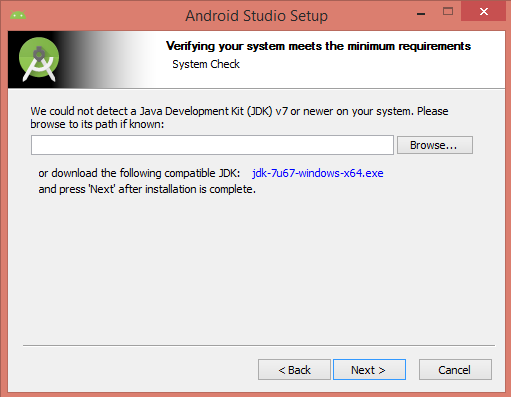
Android Studio depends on the Java Development Kit (JDK). If the JDK is not installed or is not found, the following screen appears. If not, then your JDK is functional and you can skip this part.
.
The recommended version is the JDK7 and there is a link to download the installer for this release. Click on it and you will be taken to a page of Oracle. Look for the section shown in the image below:

Confirm that you accept the license after reading everything, as they may be stealing your soul. When you feel satisfied, please download the JDK7 installer for your operating system. Windows x86 if your Windows is the 32-bit version and Windows x64 for 64-bit version. Run the installer and probably you can just click Next to everything that appears.
When the JDK installation is complete, go back to the Android Studio Setup and click Next.
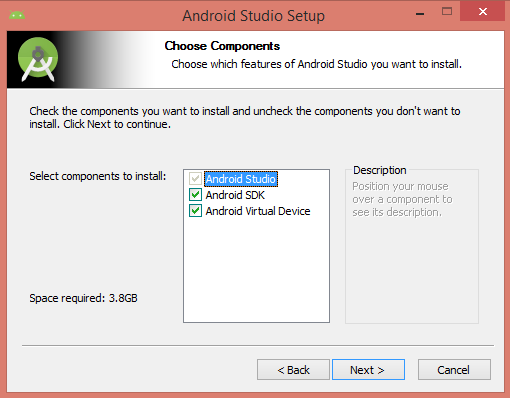
Here you can choose to install or not the Android SDK and the virtual device for testing. I recommend to select all, because without the SDK there is no way to develop an app. You will not truly need a virtual device if you own an Android smartphone, because you can use it to test your apps. But the recommendation is to install it. Unless you really want to save space, because it takes up about 1 GB. Next.
.
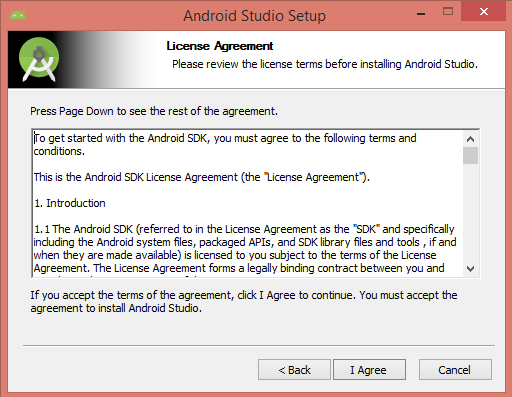
More 243 lines of license to read or click Next.
.
Below, you can choose the installation directory of the Android Studio and SDK. I left the default, to facilitate.

.
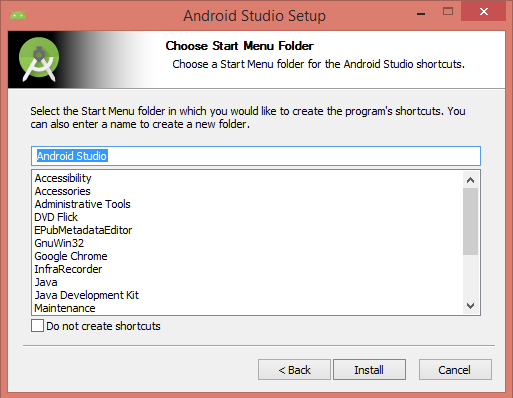
You can choose a folder on the Start menu to save the Android Studio shortcut icon.
.

.
In the installation process, Setup may try to install some Visual Studio packages. Click Finish when they are installed to continue the process.

.

.
Android Studio will start loading. The following screen will appear:
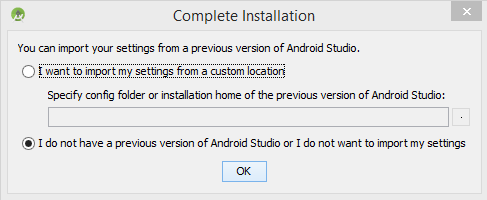
This screen provides the option to import the Android Studio settings from an old installation. If you are following this guide, it’s likely that you are installing for the first time, then you should select the option as shown above. And we are finally starting Android Studio.
.
.
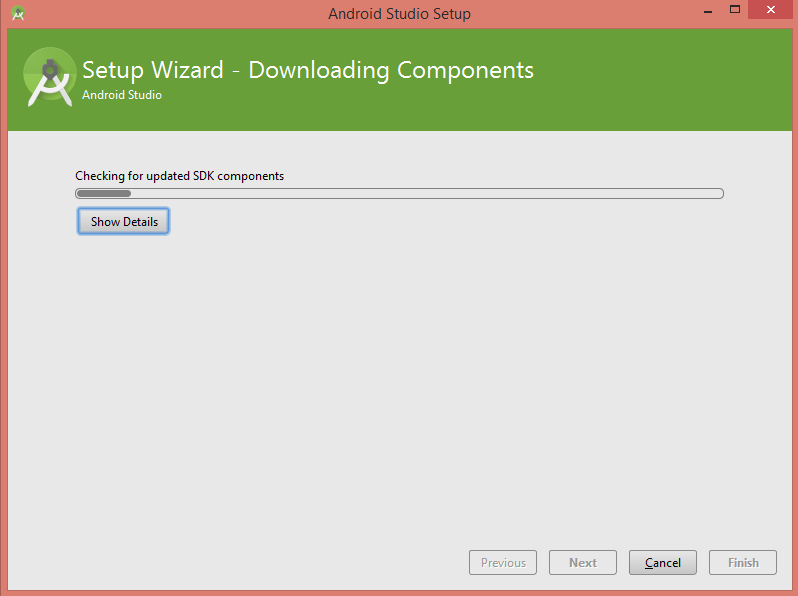
But not so fast. The software will search for SDK updates and will install them. Have patience.
.
At the end of the update, click Finish and now yeah, installation end! You barely did something, right?
Linux
If you have not already done so, install the open source version of JDK7. Installing from the available repositories is simple.
Debian/Ubuntu/Mint/Elementary OS
sudo apt-get update
sudo apt-get install openjdk-7-jdk
Fedora/Red Hat/CentOS/Amazon
sudo yum update
sudo yum install java-1.7.0-openjdk-devel
.
Download Android Studio ZIP file, extract it to the directory where you want to install it. Here, we use /opt.
sudo unzip -q android-studio-ide-135.1641136-linux.zip -d /opt
cd /opt/android-studio/bin
./studio.sh

.
The window above will appear and it is safe to click Next in the coming windows until the installation is completed. The process is similar to what happens in Windows, with decisions on which features to install, software license presentation and update of Android Studio.
Mac
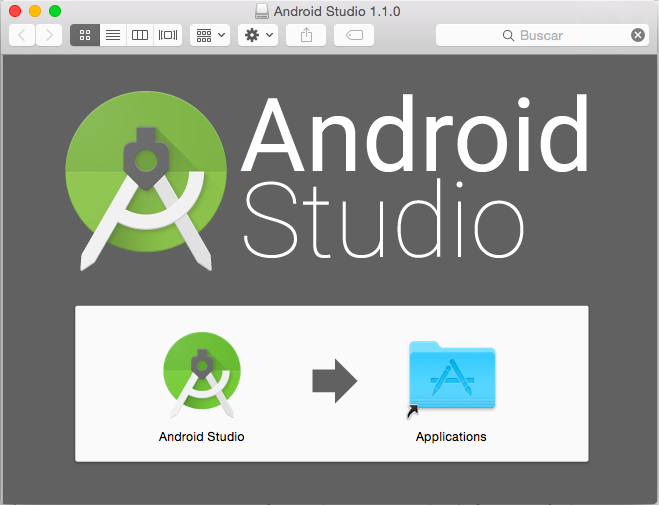
When the download finishes, execute the .dmg file and the following screen will pop up. Just drag and drop the Android Studio icon to the Applications folder. When you run it for the first time, the instalation process is similar to that of Windows.
A brief overview of the Android Studio graphical user interface
.

.
Start a new Android Studio project
Here you start a project from one of several templates already prepared. You will be guided by a sequence of screens to define the application name, directory to store the project files. There is the option to create apps for smartphones and tablets or smartTVs and wearables as smartwatches and Google Glass (this will perhaps need some extra modules). After selecting some graphical options for the home screen of your app, you will be dropped in the Android Studio workspace. Here, I selected LoginActivity and was dropped into a project whose login screen is almost all done.

.
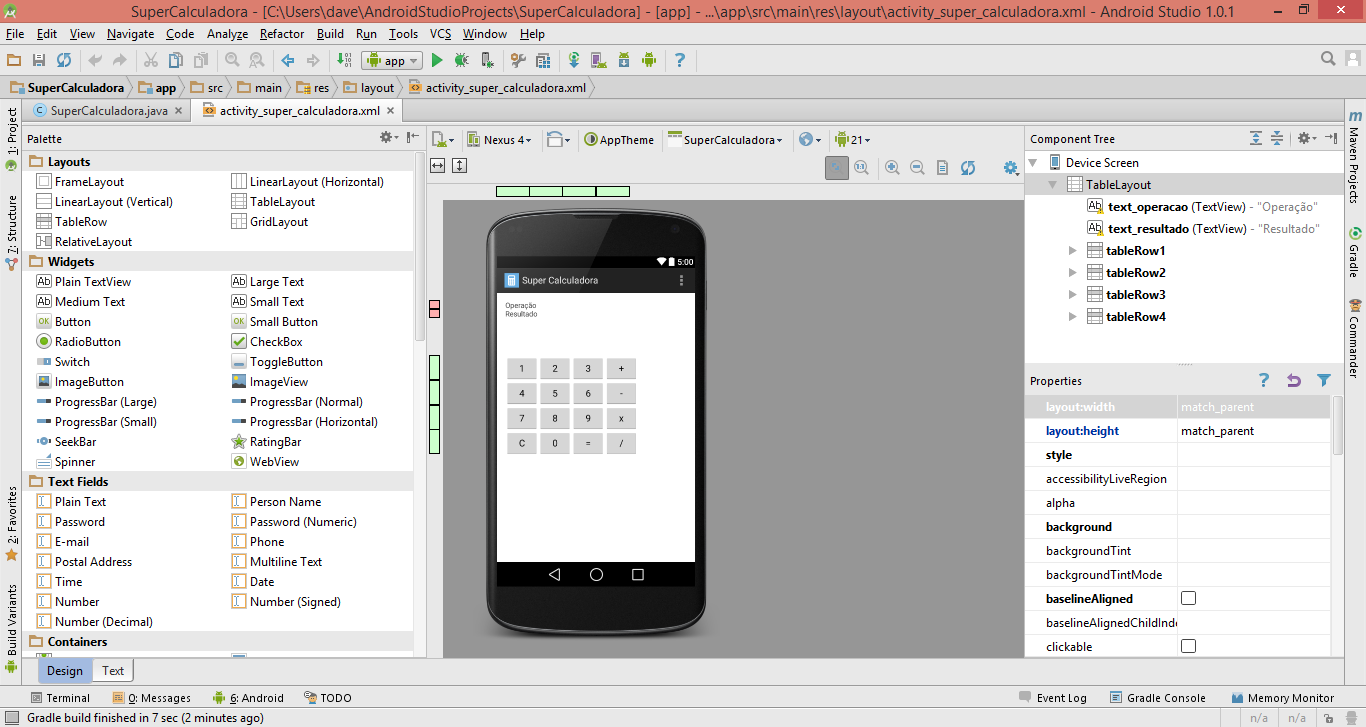
1 – The project directory hierarchy. Here you can view the source code, layout files, binaries, app figures and further configuration files. From this section you can also quickly add new files to the project.
2 – Everything (or almost everything) you will need to configure your graphical interfaces. Text boxes, images, buttons, progress bars, and other widgets. To insert a widget in the layout just drag it and carefully drop it on the preview device screen.
3 – You can choose between developing the graphical interface based on drag and drop or pure code. Preferences vary from person to person. I particularly like to use the best of each. Drag and drop to add the widget and pure code to fine-tune.
4 – A preview of your app screen appears here. It’s always good to get feedback to see if everything is in the right place.
5 – In theory, you can select a widget and configure all its properties from these fields. In practice, it is almost always preferable to use code for this.
6 – Many files can be opened at the same time and you will see them here. XML files for the design of graphical inteface, settings, features and .java for programming the core of the app.
Note for Linux users: After the installation, you’ll see that Android Studio does not have a launcher as well as other programs and can only be started from the directory where it was installed. To change this access respectively Tools → Create Desktop Entry and Tools → Command-line Create Launcher …
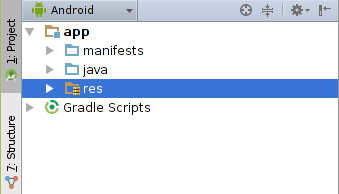
Understanding the directory hierarchy of a project
Starting with the simplest structure, under the Android tab.

app
It contains the core of your application, including classes in Java code, XML files for the graphical interface, settings, icons and other values.
manifests
Here is the manifest of the app. This file, AndroidManifest.xml, defines the app properties, the registered screens (Activities), the permissions required by the app, indication as to the minimum supported version, among others.
java
Location to store the Java classes that form the core of the application’s functionality.
res
It contains resources used by the app. This includes the application icon and other figures used (drawable), XML files that define the layout of the screens (layout) and menus (menu), plus various values related to text elements and screen dimensions supported by the app (values).
But the real structure of project directory is under the Project tab. This is the structure you will see stored on the hard drive.

.
.idea
Where the Android Studio stores the project metadata. You probably will not have to tinker here because the IDE takes care of this automatically.
app
build
Compiled classes, compile reports and all kinds of files generated during the processing of the project into an application.
libs
If necessary, this can be created and used to store new libraries or .jar files that your app depends on.
src
Here are stored your project code files, Java classes, layout files, strings.
gradle
This directory contains an important file called gradle-wrapper that will be used in the construction of APK. It communicates with the operating system and ensures that the project will be built with the correct version of Gradle.
What is Gradle
When you are developing your project, all you have initially is the Java classes, layout files and various XML files that define how your app should be. A build system for Android is responsible for analyzing and organizing all these separate files and compress all in one APK file, which is used to distribute and install the app. And Gradle does just that, it’s the build system used by Android Studio. Gradle is a tool with many features and allows you to automate or customize build tasks, create APKs with different permissions based on the same project, among other features.
The process of generating an APK based on source files is a bit complicated and would be extremely discouraging if there were not a tool to make it automatic. This makes the use of Gradle a key in Android Studio. If you are interested in the process of APK generation, a good start is this page on Android Developers.
Extras
Importing samples
There are many app samples that you can import directly from Github to Android Studio. Go to File → Import Sample … and select a sample to import.

If you experience any error, it is likely that some necessary modules are not installed. In this case, Android Studio will offer an option to install them.
Importing a project
You can import projects originally made on Eclipse or Android Studio.
Acess File → Import Project…
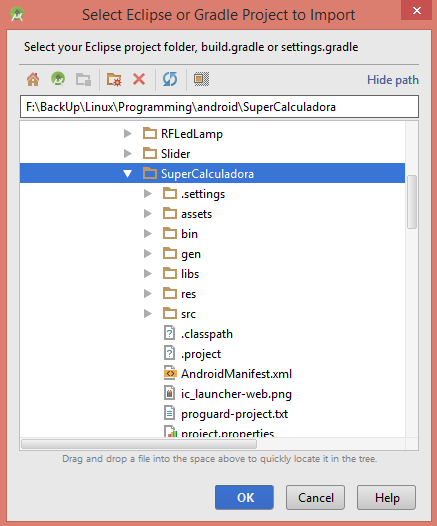
Now locate the directory where is your project and click OK. Then select the new location where it should be stored. When importing an Eclipse project, some warnings may appear on the screen saying that Android Studio will be trying to convert the project to the Gradle model and that errors may occur, but if you leave the options selected, it will do the best it can. If a library is missing, Android Studio will detect and provide an option to install it. Other errors may require specific solutions.
Testing the app in a virtual device
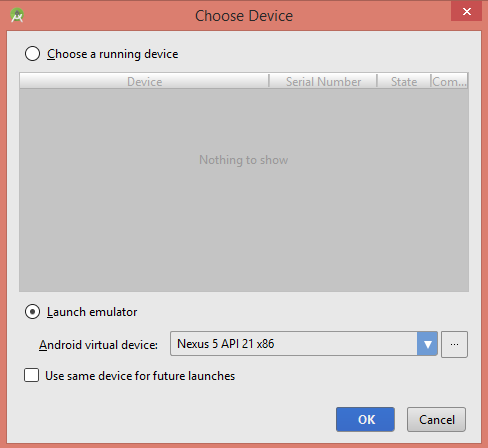
To run the app on the Android Virtual Device, click the green play button, Run. Or use the Shift+F10 shortcut. The app will be compiled and a dialog box will appear. Select the Lauch Emulator option.
.
Windows
In my case, in Windows, the following error occurred:
emulator: ERROR: x86 emulation currently requires hardware acceleration!
Please ensure Intel HAXM is properly installed and usable.
CPU acceleration status: HAX kernel module is not installed!
To solve this problem, search for the SDK Manager in the toolbar and make sure Intel x86 Emulator Accelerator (HAXM installer) is installed.
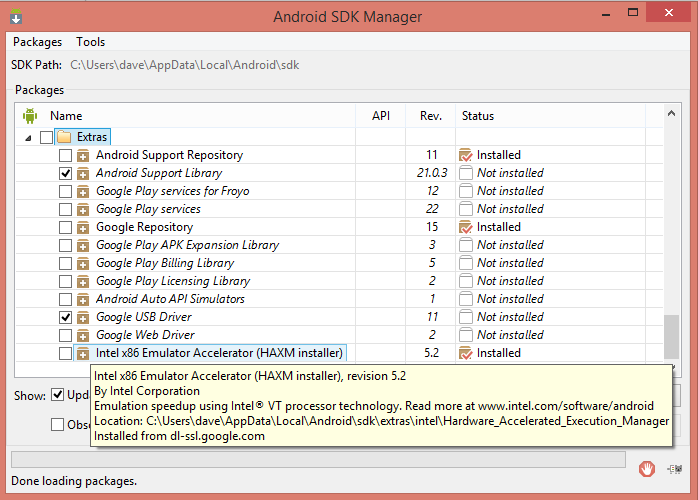
Look for \extras\intel\Hardware_Accelerated_Execution_Manager within the directory where the SDK was installed and run the intelhaxm-android.exe file. If you followed the default installation, the SDK must be installed in C:\users\username\AppData\Local\Android\sdk. Note that AppData is a hidden directory, so you have to enable the option to view hidden files in Windows Explorer.
Try running the virtual device again.
.
Linux
In Linux, unfortunately, I also encountered an error:
emulator: ERROR: unknown skin name ‘nexus_5’
The solution was to delete the default virtual device, generated by Android Studio installation, and create a new one.
Adding a virtual device
Go to AVD Manager. There you will see the list of existing virtual devices. Click Create Virtual Device and select a device to create. You can choose from smartphones, tablets, wearables and even a TV. Then you choose the version of Android that will execute on the virtual device. If it does not come with the installation, you have the option to download the desired version.
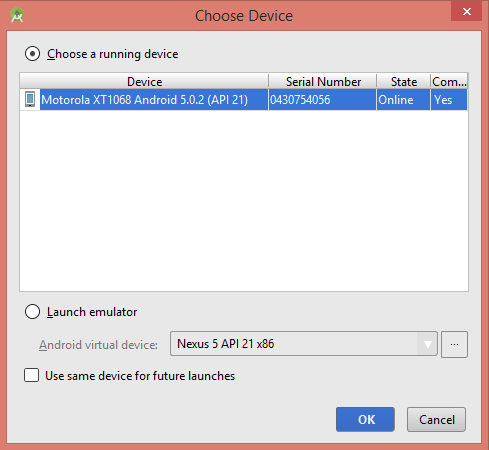
Testing the app in a real device
Press the green play button or Shift+F10 again. But now you should be with your Android device connected via USB. Also, do not forget to enable USB debugging on developer options of your device.
Where to find the APK generated after build
With the APK file you can distribute your app to friends in the underground way. Look inside the main project directory in app/build/outputs/apk. The file you seek is named as app-debug.apk, just change the name and voila, your APK. Do not forget that the option to install from unknown sources should be enabled on the device to install APKs outside the Play Store. This option is in Settings → Security.
How to choose the app icon
Before, in ADT, the app icon was set during the process of creating a project. But in Android Studio, the wizard is shorter and the app starts with a standard icon. To change the icon, you must right click the res directory, thenNew → Image Asset.
A new window will open so that you can configure the new icon. You have the option to select an image from your hard drive, an image from the Android icon set or a small text. Additional configurations are available. You can safely test all of them.

.
OK! We’re done for now. If you have any difficulty looking for another feature, do not be shy to ask and till the next post about Android.
.