Hey Hackaday readers! Unfortunately this post is not about reverse engineering of the pocketStation, I guess Hackaday got it wrong because the original post is in Portuguese. Yet, it actually is about how I got to burn new ROMs and read its contents as well. If you like to stay, enjoy yourself.
Intro
I would like to start by talking about the many hours of fun in my childhood provided by my Playstation, but unfortunately, I never had one. If I’m not mistaken, the only PS1 game I ever played was Digimon Rumble Arena. Despite this, because of my interest in video games and hardware, I know one thing or another about it.
Nintendo and Sony united to create a device that would allow the SNES to use CDs. Nintendo canceled the project with Sony, who decided to create their own console. Nintendo after a while would join (and would also give up) Philips with the same purpose. What resulted in CD-i, and things like these.
Yes, about the Playstation. I found on eBay this device called PocketStation, which was released in Japan only. The PocketStation can be used as a Plasystation memory card, but also as a tiny portable console, running extras that came with PS1 Games. Final Fantasy XIII for example, came with Chocobo World that ran in the PocketStation. The PocketStation also allowed you to send or exchange saves with friends through an infrared port.

Researching a little, I found info that said the PocketStation had an AMR 7TDMI processor, the same as the GBA. The screen resolution of 32×32 pixels, 128KB of program memory, 2KB of RAM, powerful specifications for something 16 years ago. I ended up buying a unit on eBay, even without knowing about its communication protocol or how to “inject” code into the device.
First, I had to figure out how to access its program memory. The programs that the PocketStation runs are stored as saves. They are usually burned by the console that recognizes the PocketStation simply as if it were an ordinary memory card. I then searched for console-memory card communication.
Reading Saves
Protocol e Signals
Martin Korth, not only programmed the PS1 emulator no$psx (no cash psx), but also did an excellent job of documentation on the PlayStation insides. Its page explains everything about the hardware of the console and the signals and protocols used between video game and controls, memory cards and even rod controls for fishing games (portuguese: eita).
In his page, You can find the protocol specifications used by the console to access controls and memory cards. In summary, the protocol is similar to SPI. The clock line is idle in high state (CPOL = 1), input is picked up at the rising edge and the output is changed at the descent edge (CPHA = 1), while data is transferred at 250KHz, starting with the least significant bit (LSB first). In addition, there is also an ACK pin that responds with a pulse after a byte is transmitted.
I looked for a ready implementation to access the stored saves. I found ShendoXT blog, but could not get his python script to work. My Arduino code is slightly based on his sketch though.
Connection of the memory card/pocketstation to Arduino
The Arduino code uses the SPI port, these pins can not be changed and depend on the board. In most Arduino boards this was standard, but with the appearance of new boards the SPI pins vary greatly. I used an Arduino mini that I bought on eBay for less than two dollars.

Below a description of the pins and their connection to the Arduino (UNO,mini,Nano,NG):
  _____________
 /             \       Pin connections:
|               |         1 - Data        -> Connect to pin 12 on Arduino (MISO)
|               |         2 - Command     -> Pin 11 of Arduino (MOSI)
|  MEMORY CARD  |         3 - 7.6V        -> 5V of Arduino
|               |         4 - GND         -> Gnd of Arduino
|               |         5 - 3.6V        -> 3.3 of Arduino
|_______________|         6 - Atention    -> Pin 10 of Arduino (CS)
|1 2|3 4 5|6 7 8|         7 - Clock       -> Pin 13 of Arduino (SCL)
                          8 - Acknowledge -> Pin 2 of Arduino (INT0)
i did not have aMemory card slot, so what to do?
I have been using these pin headers in all kinds of workarounds, haha. Here I used a double one, the connection is stable enough. Always works ;)
 Improvised memory card slot.
Okay, everything connected. time to code!
SPI port configuration on Arduino
From the specs on the no$psx page, SPI was configured as follows:
  //activate pull up
  pinMode(2, INPUT);
  digitalWrite(2, HIGH);
  pinMode(12, INPUT);//For Arduino Uno,Mini...
  digitalWrite(12, HIGH);

  SPI.setClockDivider(SPI_CLOCK_DIV64);//16MHz/64 =250KHz
  SPI.setBitOrder(LSBFIRST);
  SPI.setDataMode(SPI_MODE3);//CPHA=1 CPOL=1
  SPI.begin();
The two first lines are to activate the pull up resistors on the input pins, as the memory card can only lower the line voltage level. New Arduino models have SPI on different pins, so the code may needs to be adjusted accordingly.
Byte transmission
byte transfer(byte data) {
  byte rx;
  response = HIGH;
  rx = SPI.transfer(data);
  int timeout = 2000;
  while (response == HIGH) {
    delayMicroseconds(1);
    timeout--;
    if (timeout == 0) return 0;
  }
  return rx;
}
Transmission is simple, as the SPI port takes over. However, notice the delay after the transmission. An ACK is expected to grant receipt of the byte. When the ACK is received, the program starts to transmit the next byte.
At the time that the SPI port transmits one byte, another byte is received following, that byte is returned by the tranfer() function. This is useful since the memory card returns specific values in certain situations, for example, when the last byte of a packet is transmitted, a 0x47 (Ascii ‘G’ for good) is returned if it is ok.
Reading saves code for the Arduino
Given the info about the reading and writing commands in the no$psx page, the following code is used to read from a sector of flash. There are in all 1024 sectors of 128 bytes, 16 of these sectors form a block and a save always uses at least one block. The first block in flash is used as a directory and contains information of which blocks are occupied and with which save file.
void readSector(unsigned int Adr) {
  digitalWrite(CS, LOW);
  transfer(0x81);
  transfer(0x52);
  transfer(0x00);
  transfer(0x00);
  transfer(Adr >> 8);
  transfer(Adr & 0xFF);
  transfer(0x00);
  transfer(0x00);
  transfer(0x00);
  transfer(0x00);
  for (int i = 0; i < 128; i++) {
    Serial.write(transfer(0x00));
  }
  transfer(0x00);
  SPI.transfer(0x00);
  digitalWrite(CS, HIGH);
  delayMicroseconds(500);
}
This function is used 1024 times to read all sectors. That simple.
Reading scrip in Python
The Python script just receives the bytes from the serial port and saves them to a file.
romsize=128*1024 #128K
name=input("What's the name of the file?")
ser.write(bytes("R","ASCII"))
numBytes=0
f = open(name, 'ab')#open for appending
while (numBytes<romsize):
    while ser.inWaiting()==0:
        print("waiting...\n",numBytes)#shows the number of bytes read
        time.sleep(0.1)
    data = ser.read(1)
    f.write(data)#put a byte to the file
    numBytes=numBytes+1
Burning saves
To store the saves just use the same Python script and select the write option. Recording is a more delicate process than reading and every time a sector is sent to Arduino, the bytes are checked before writing to memory, if the checksum is different than expected, Arduino requests the retransmission of that sector.
Below the writeSector () function in Arduino:
void writeSector(unsigned char MSB, unsigned char LSB){
  byte dataBuffer[128];
  byte response;
  for(int i=0;i<128;i++){
        while(Serial.available()==0);
        dataBuffer[i]=Serial.read();
  }
  byte CHK = MSB;
  CHK^=LSB;
  digitalWrite(CS, LOW);
  transfer(0x81);
  transfer(0x57);
  transfer(0x00);
  transfer(0x00);
  transfer(MSB);
  transfer(LSB);
  for (int i = 0; i < 128; i++)
  {
    transfer(dataBuffer[i]);
    CHK ^= dataBuffer[i];
  }
  transfer(CHK);
  transfer(0x00);
  transfer(0x00);
  response = SPI.transfer(0x00);//At least for the Pocket Station, the last byte never gives a ACK, so the tranfer method is not used here to agilise.
  digitalWrite(CS, HIGH);
  delayMicroseconds(500);
  if(response!='G')CHK=~CHK;//problem at writing sector, forces the PC to resend the sector by chaging the CHK
  Serial.write(CHK);
}
Python code:
f = open(name, 'rb')
for i in range(1024):
    ser.write(bytes("W","ASCII" ))
    time.sleep(0.001)
    ser.write(struct.pack(">B",i>>8))
    CHK=i>>8
    time.sleep(0.001)
    ser.write(struct.pack(">B",i&0xFF))
    CHK^=i&0xFF
    time.sleep(0.001)
    data=f.read(128);
    print(data)
    print("CHK:", CHK)
    for i in range(len(data)):
         CHK =CHK^data[i]
    time.sleep(0.001)
    print("CHK:", CHK)
    response=~CHK
    while response!=CHK:
        ser.write(data)
        while ser.inWaiting()==0:
            time.sleep(0.0001)
        response=ord(ser.read(1))
        print("rsp", response)
f.close()
The complete code is over my github.
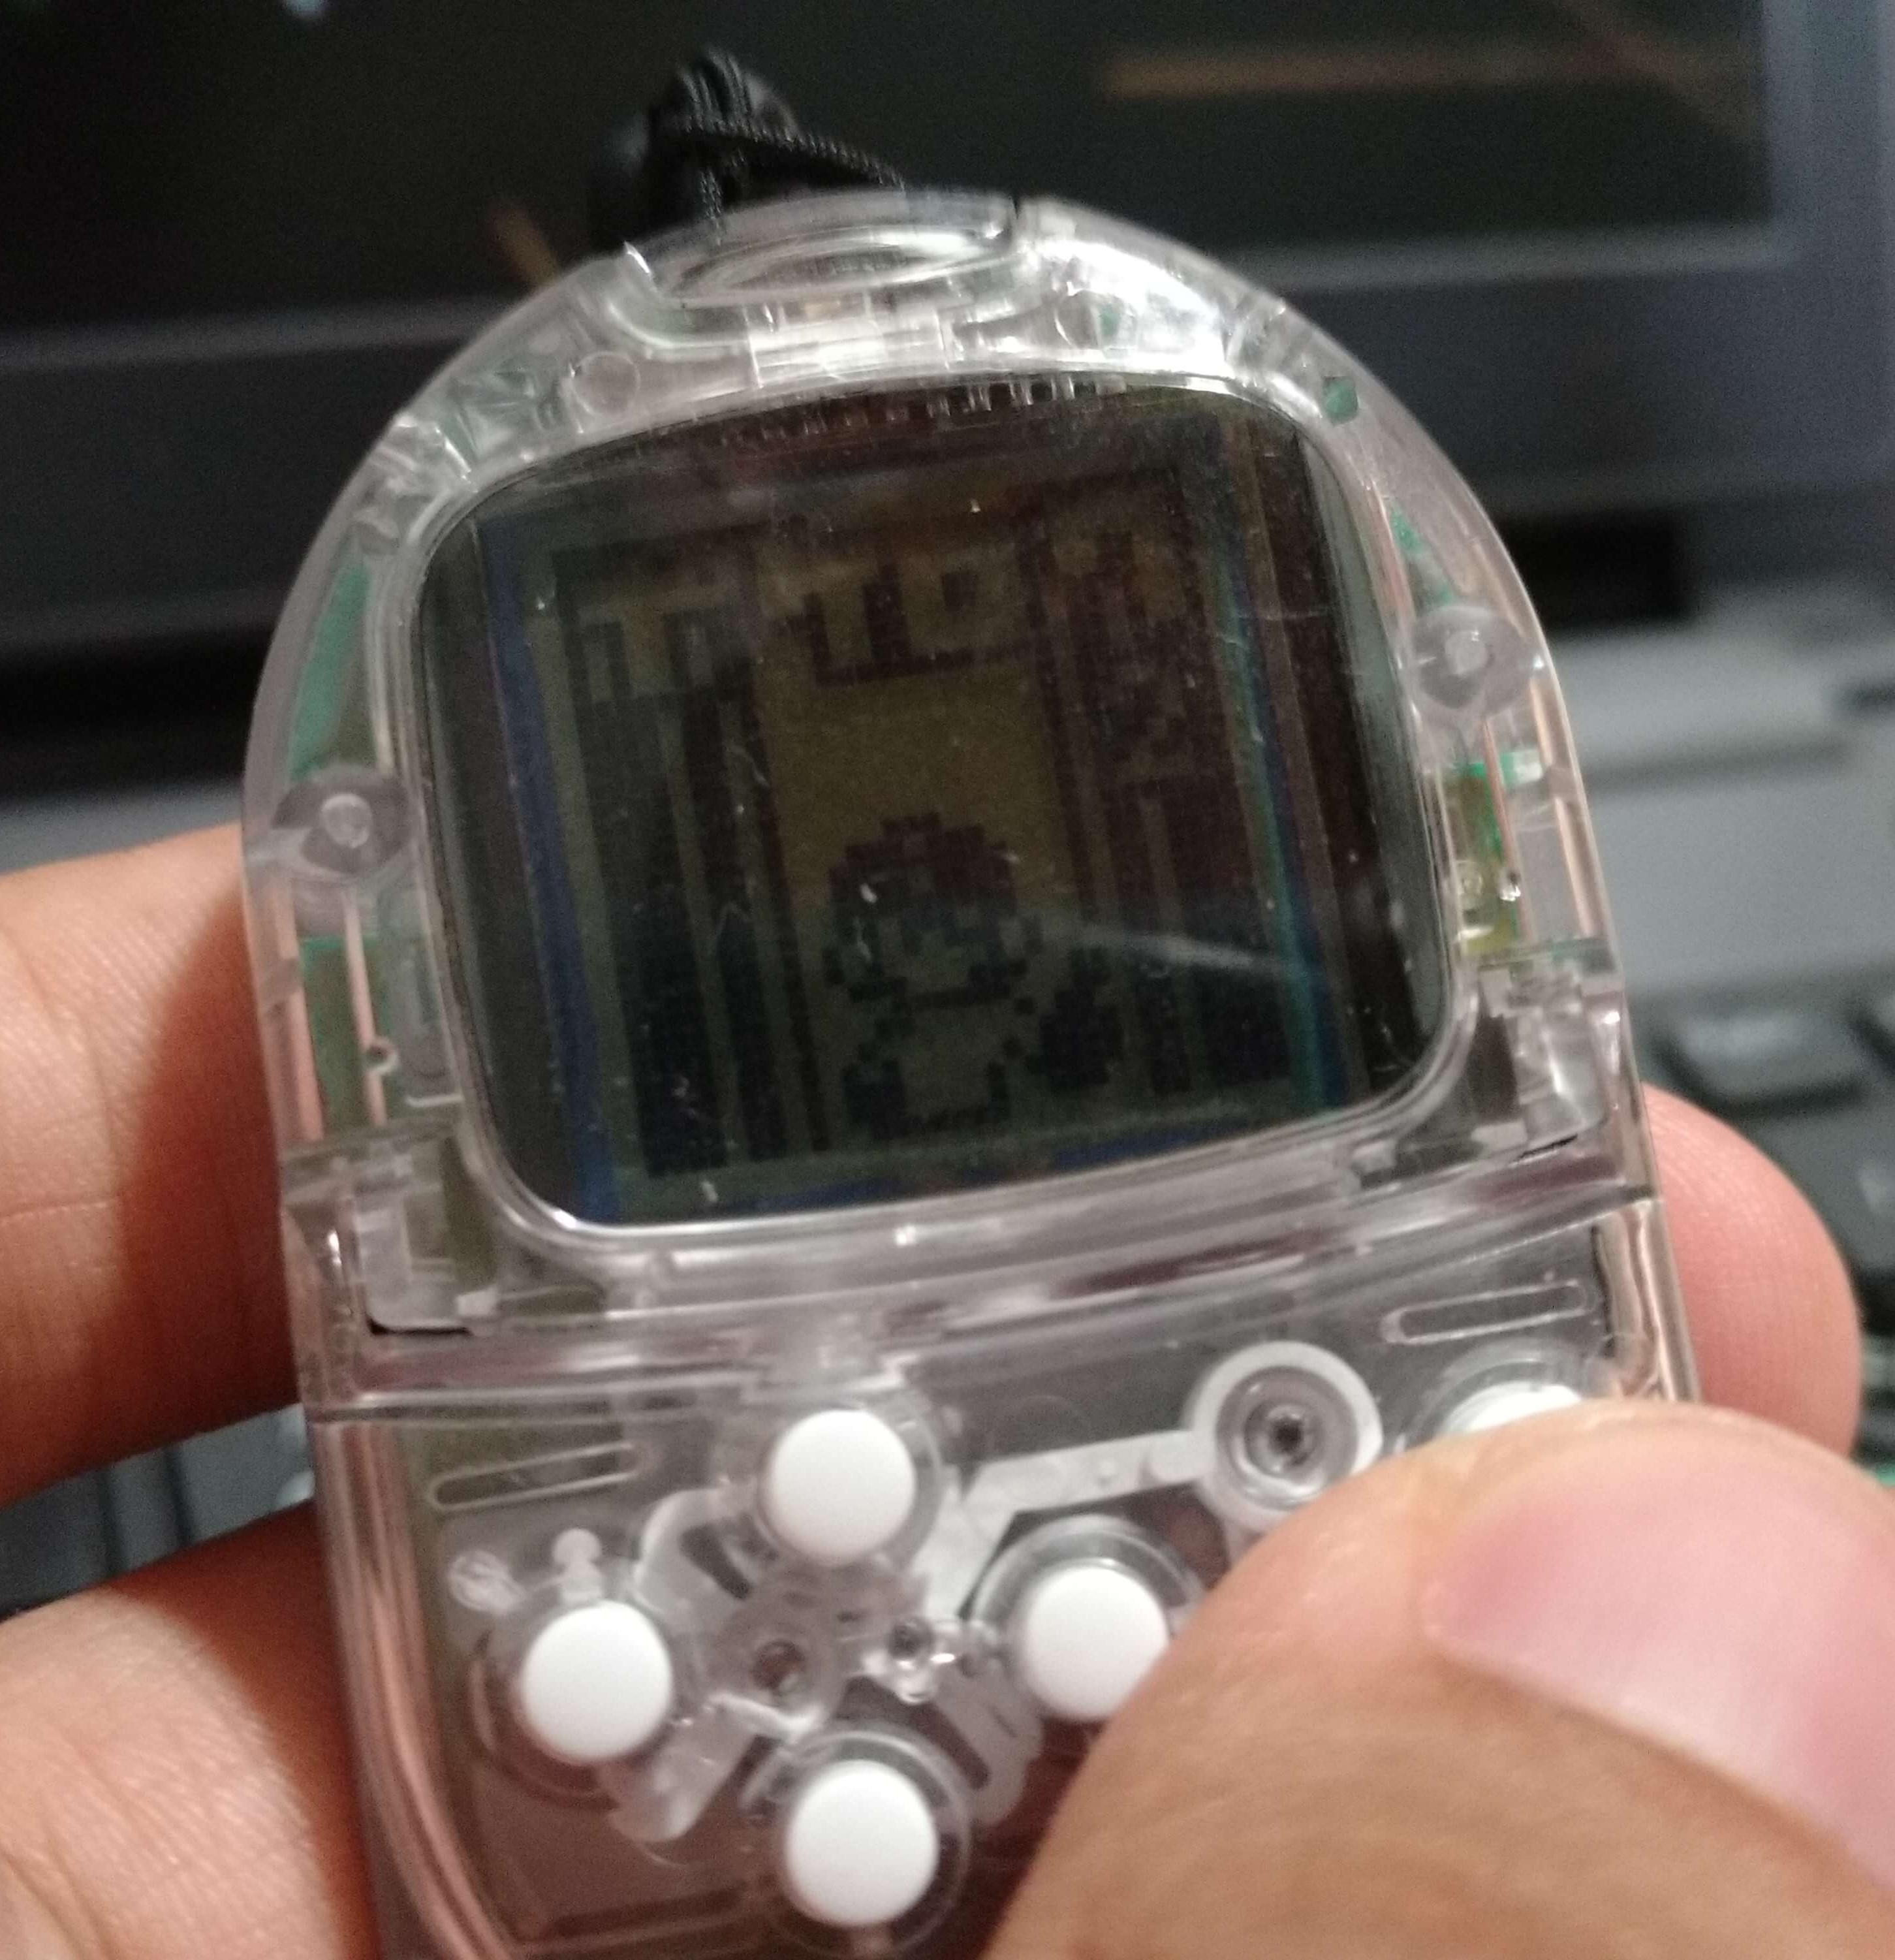
Below is a Megaman2 rom for the pocketstation that was burned with the Arduino. Success!
Alternative Hardware
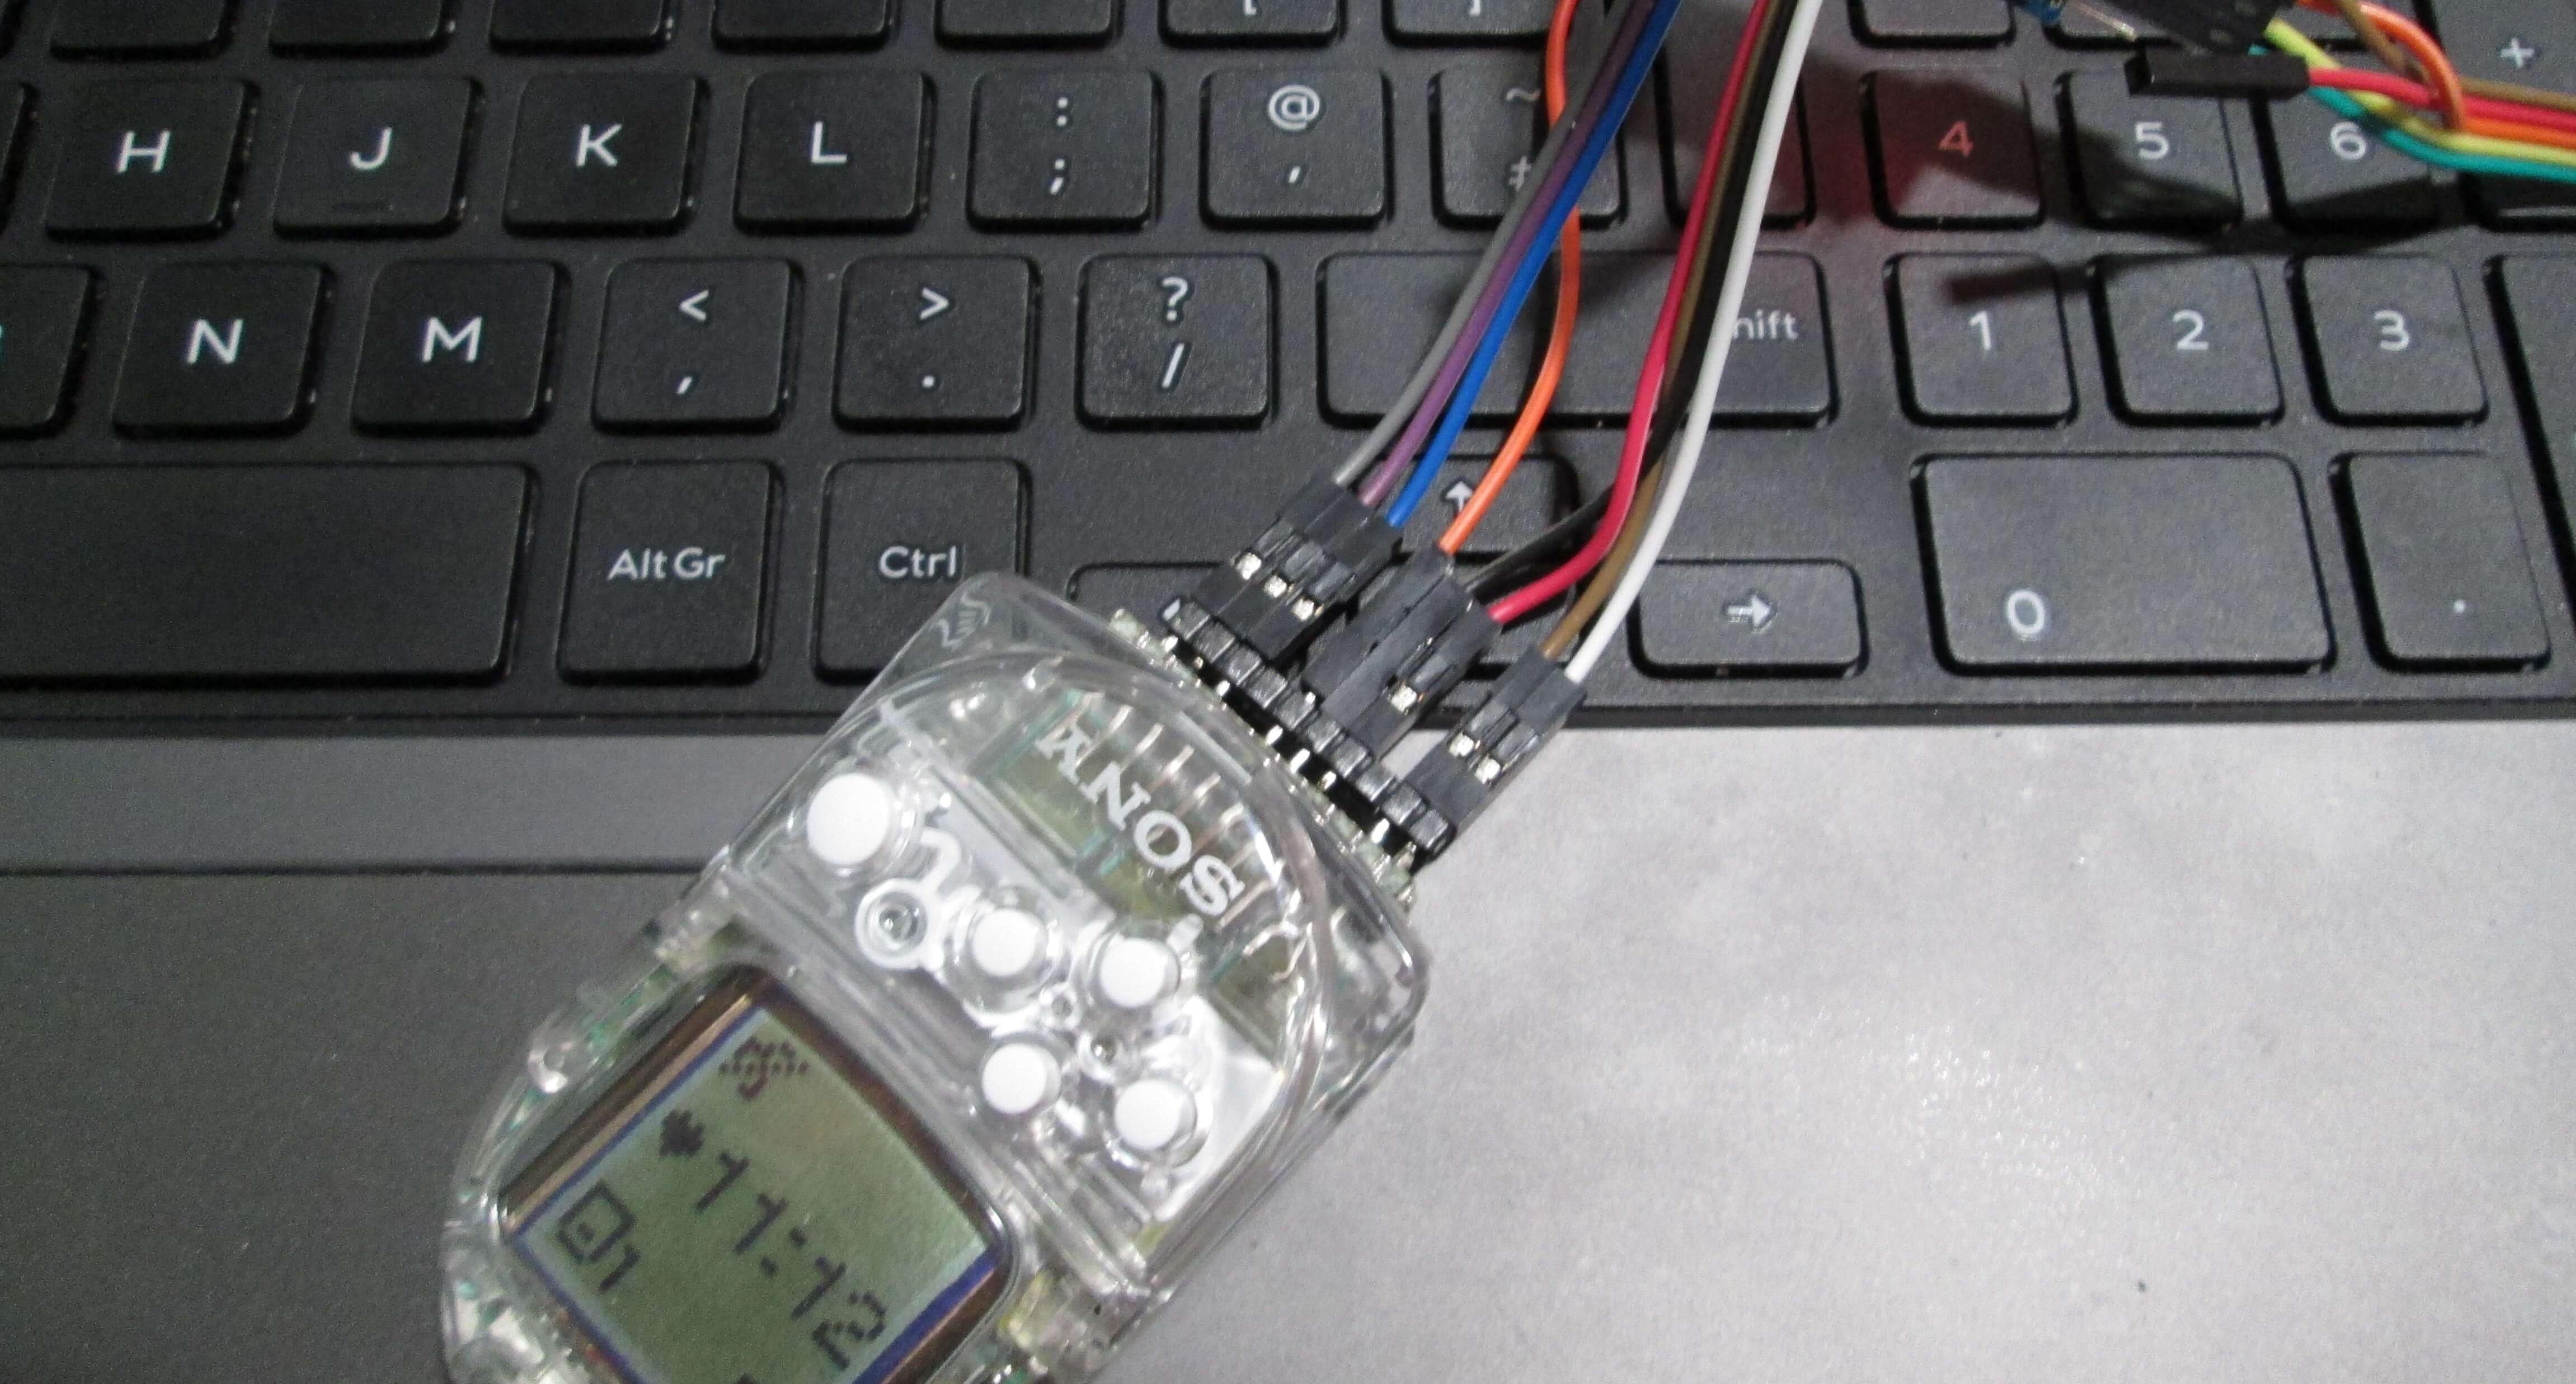
Haved a bunch of cables every time you connect the memory card / pocketstation is not cool. So I soldered the board below, using one of the spare atmega8 I have here. That way I just need to connect the device to an ftdi converter and I can swap the saves easily.

Whenever the pocketstation is being written to, it shows this message and lights up the led at the top.
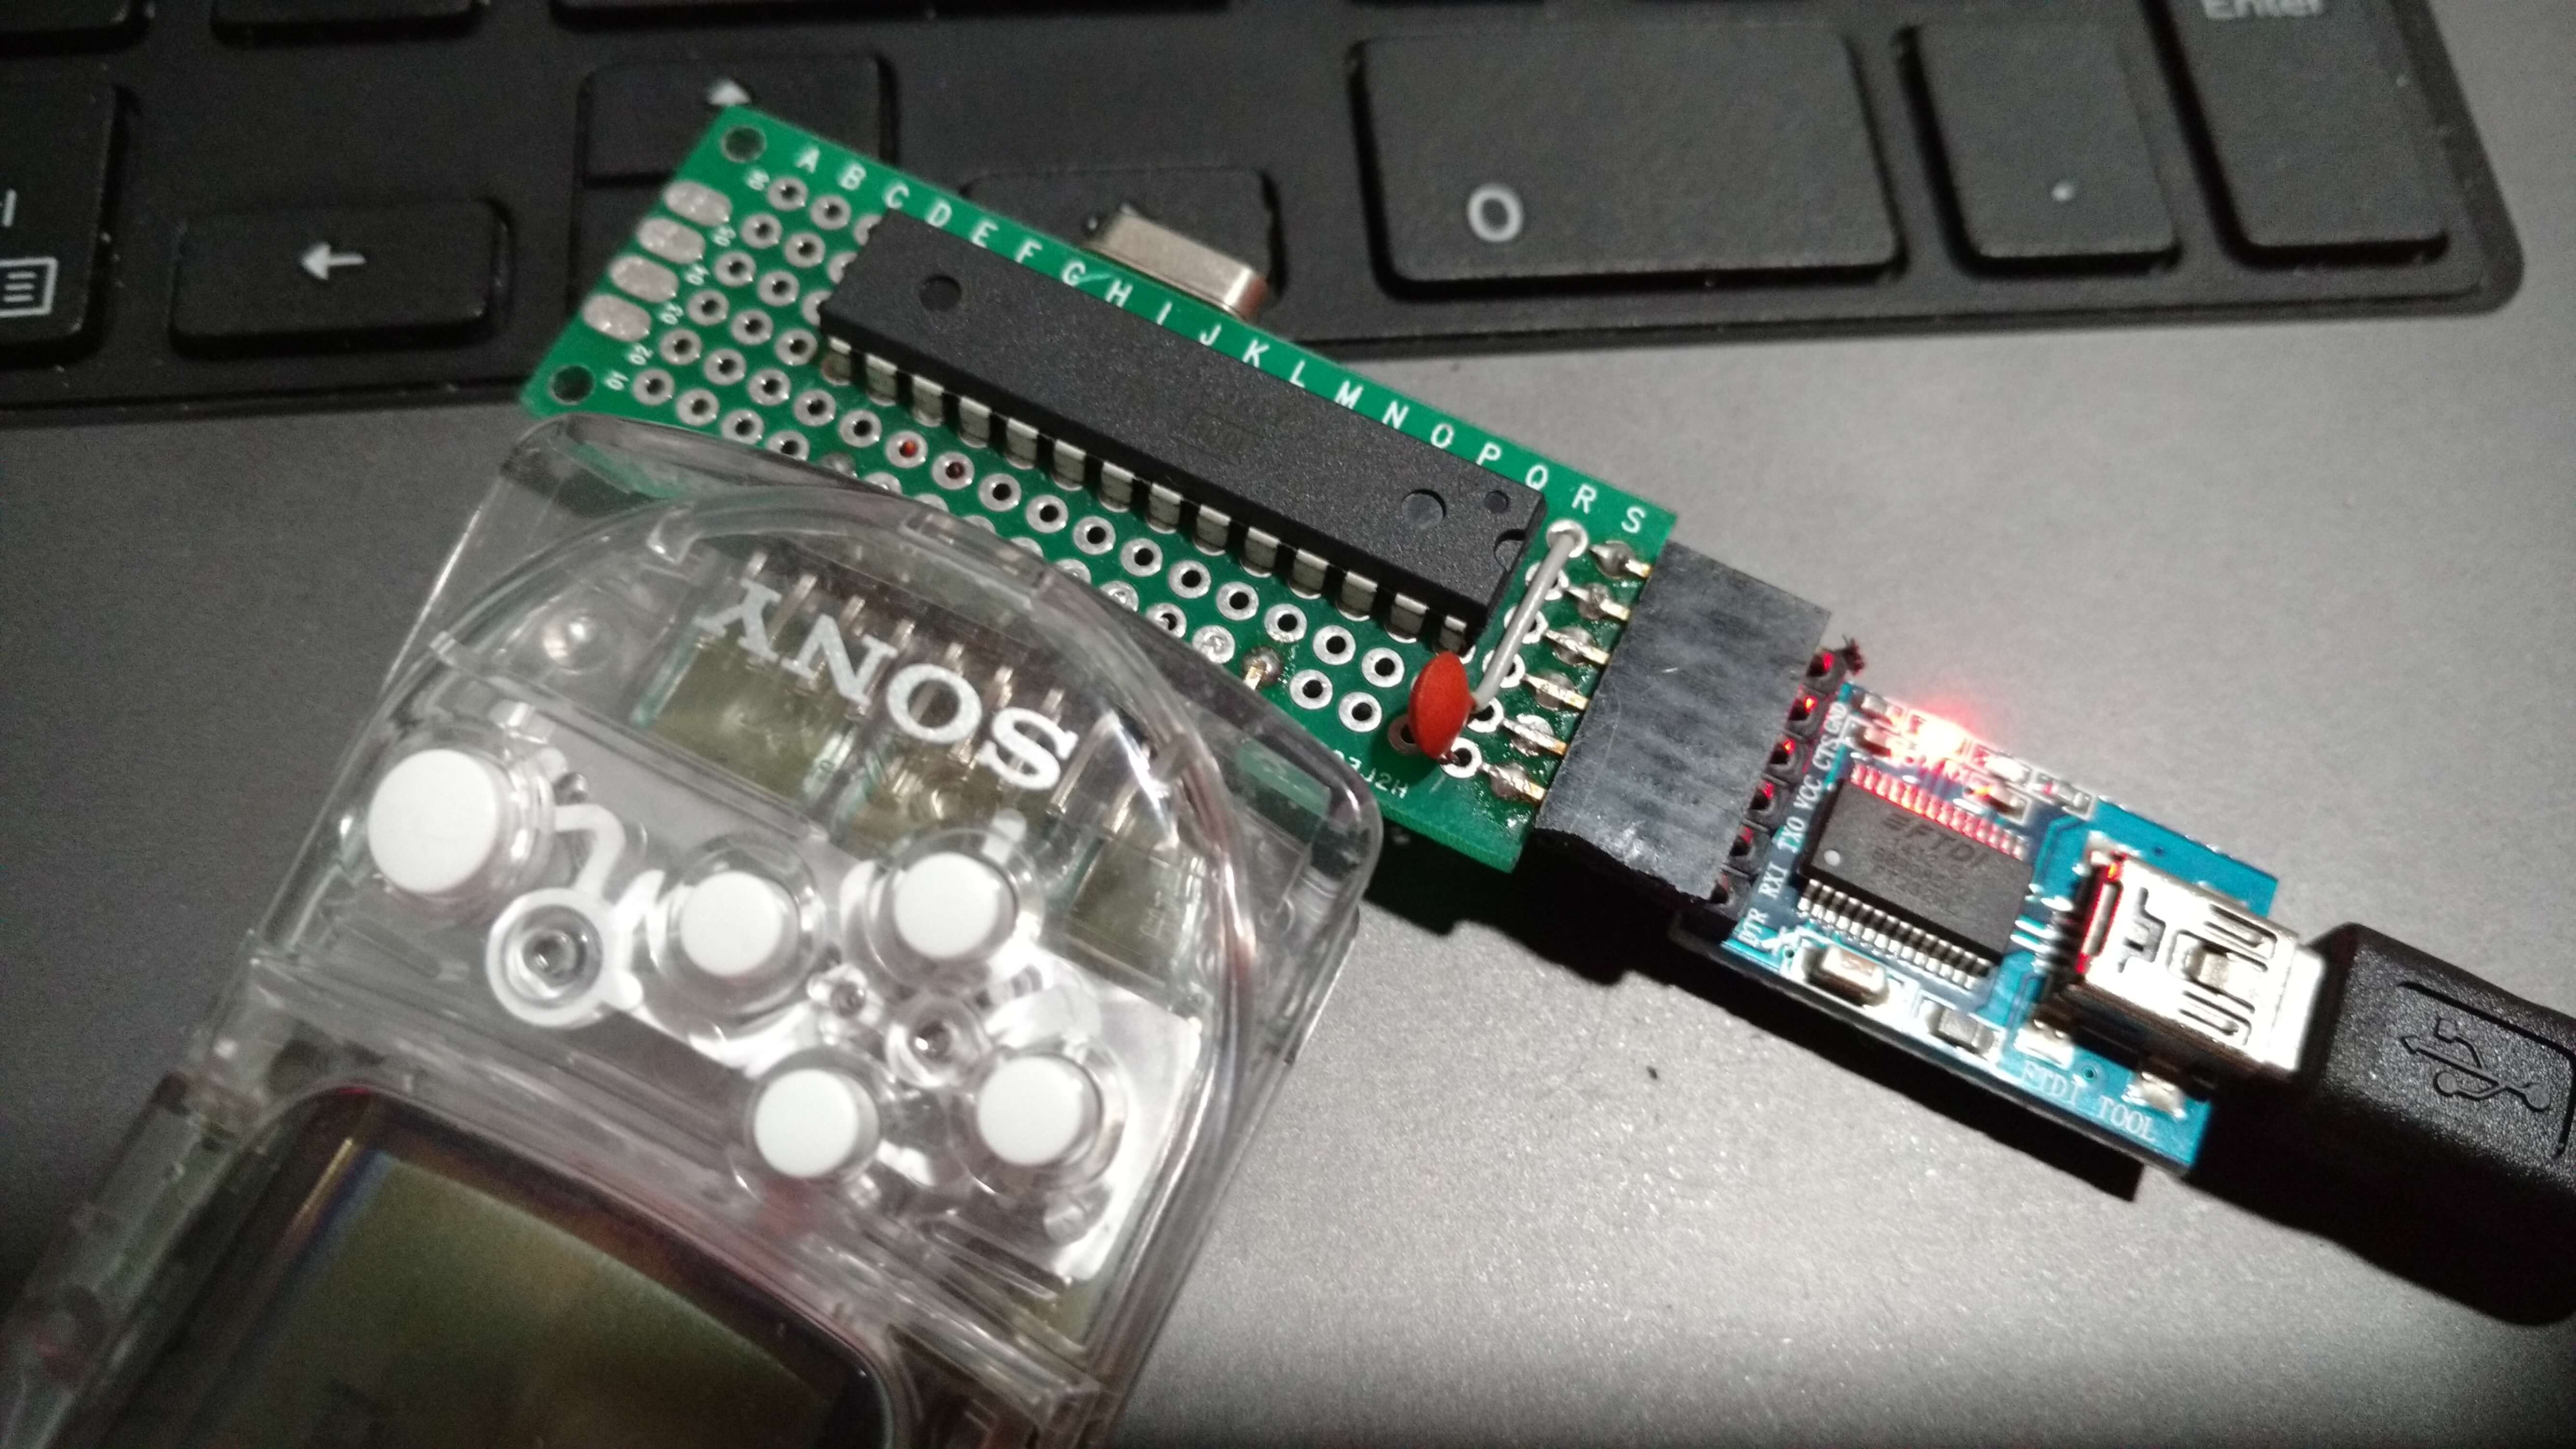 An Atmega8 was used. No code modification was required.
Then that’s it. Now you know how to transfer your saves to the computer or save saves from the internet to your memory card. :)
See ya next post 0/
This post is under the Do What The Fuck You Want To public license.


Boa, será que tem como dumpar aqueles games exclusivos que se obtinham por infra vermelho?