
Good morning, good afternoon and good night, folks. Your application will be very boring if there is a single screen. You will need to learn how to create multiple screens and make the transition between them. Using the Android APIs, Activity and Intent classes, these tasks become very simple.
Activities are components that allow the presentation of a screen to the user. They contain descriptions of all displayed components such as buttons, text, images, videos, in short, all the elements visible on the screen. Although there is the possibility to configure the elements and their positions by means of Java code, it is strongly recommended to use an XML file. The use of XML provides a simple and organized way to work with the graphical interface. But you prefer to build your app interface only by dragging the components into the screen, right? Okay, the only difference here is that the Android Studio does the job automatically, updating the XML file for the Activity. You can switch between graphic and text modes by clicking Design or Text, respectively, when building your app interface.
In addition, Activities contains descriptions of the actions to be performed when the user interacts with its components. Here we use Java code contained in an Activity subclass. When you create a project and choose to start with an empty Activity (Blank Activity), Android Studio automatically creates an XML file with “Hello World” and the MainActivity.java file, which contains an Activity subclass. Here are some methods of this class.
onCreate(): executed just before the Activity appears on the screen. Here you can add settings that must happen before you get a visual impression of the Activity.
onCreateOptionsMenu(): executed when the user requests the options menu. If you delete it when the user clicks menu, nothing happens.
onOptionsItemSelected(): executed when the user selects an item from the options menu. If you do not add instructions here, when an item is selected, nothing happens.
Activities have many other methods that you can override (that @override). The documentation of the Activity class specifies all of these methods and their functions. See also this flow chart showing the life cycle of an Activity, indicating which methods are executed and at what time. Ooops!
Now to the main point of the post. Your app probably will not have only one screen. This means that you will have to create several Activities and make the transition from one to another.
Let’s learn how to switch between Activities!
.
Alternating between two Activities
I’ll assume that you already have a vague idea of how to drag the elements to the screen or edit the XML file to design your Activity. You can create any look, but to better guide this tutorial we will use the following.

<RelativeLayout
    xmlns:android="http://schemas.android.com/apk/res/android"
    xmlns:tools="http://schemas.android.com/tools"
    android:layout_width="match_parent"
    android:layout_height="match_parent"
    android:paddingLeft="4dp"
    android:paddingRight="4dp"
    android:paddingTop="4dp"
    android:paddingBottom="4dp"
    tools:context=".MainActivity"
    android:background="#ff6eb6ff"
    android:onClick="startSecondActivity">


    <TextView
        android:layout_width="wrap_content"
        android:layout_height="wrap_content"
        android:textAppearance="?android:attr/textAppearanceLarge"
        android:text="DRAGÃO"
        android:id="@+id/textView"
        android:layout_centerVertical="true"
        android:layout_centerHorizontal="true"
        android:textSize="@dimen/abc_text_size_display_3_material"
        android:textColor="#ffffffff" />
</RelativeLayout>
Our first Activity was created. It only contains a TextView in the center. The line of most interest to us, for now, is 12. The parameter android:onClick defines what method of the Activity is executed when the user clicks on an element. In this case, the parameter is applied to RelativeLayout, which here takes the whole screen area. Line 12 makes startSecondActivity() execute whenever the user clicks anywhere on the screen. But wait! This method does not yet exist. Neither the second Activity. So let’s work on it now.
First, about the startSecondActivity() method. This method must belong to MainActivity class. Then go to the Java file that represents this Activity and add the following method to the class.
public void startSecondActivity(View view) {

    Intent secondActivity = new Intent(this, SecondActivity.class);
    startActivity(secondActivity);
}
The two lines contained in the above method are the core of the transition process between screens on Android.
The Intent class is an abstract description of an operation to be performed. Intents are required to make transitions between Activities, request services from other applications (camera, share on social networks …), broadcasts, among other processes.
Look at line 3, which declares an instance of Intent. To start another Activity, the class constructor takes two parameters: the context of the current Activity and the Activity class to be started. The Intent object carries all the information needed to start the next Activity. And finally, the startActivity() method performs the operations described in the Intent. New Activity on the screen, yeah! Oops, we need to create this new Activity.
Android Studio facilitates the addition of an Activity to the project. Just go to Project → Android tab.
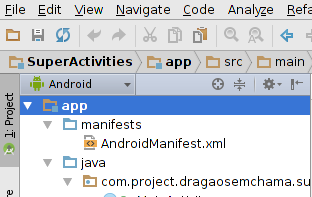
One click with the right mouse button in app and then New → Activity. You will have some examples of Activities already implemented. You can choose any of them, but, as I like a bit of minimalism, I usually use Blank Activity.
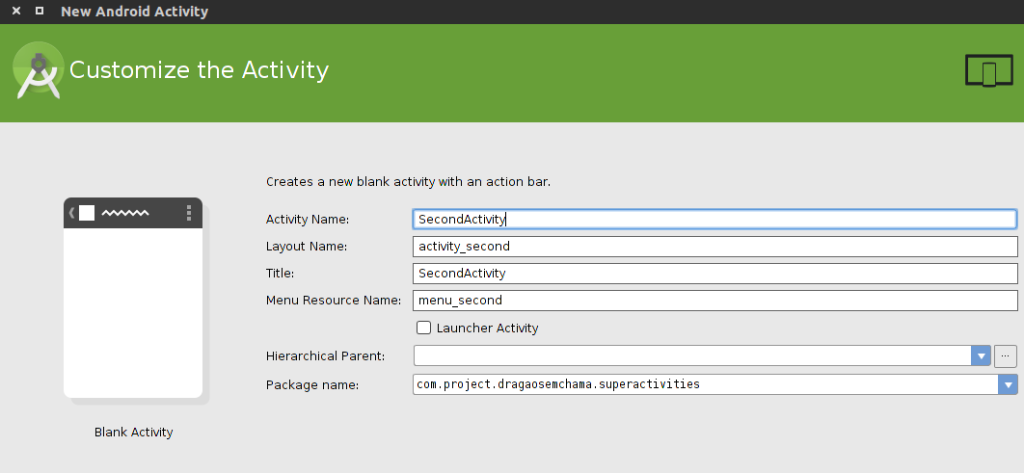
Thus, we have a new XML file and the class of the newly created Activity. You can test the app now. When you click on the first screen, the second will be loaded and displayed!
But to make everything more beautiful, modify the graphical interface of the second Activity and leave it as follows.

<RelativeLayout
    xmlns:android="http://schemas.android.com/apk/res/android"
    xmlns:tools="http://schemas.android.com/tools"
    android:layout_width="match_parent"
    android:layout_height="match_parent"
    android:paddingLeft="4dp"
    android:paddingRight="4dp"
    android:paddingTop="4dp"
    android:paddingBottom="4dp"
    tools:context=".MainActivity"
    android:background="#ff0fffab">


    <TextView
        android:layout_width="wrap_content"
        android:layout_height="wrap_content"
        android:textAppearance="?android:attr/textAppearanceLarge"
        android:text="SEM"
        android:id="@+id/textView"
        android:layout_centerVertical="true"
        android:layout_centerHorizontal="true"
        android:textSize="@dimen/abc_text_size_display_3_material"
        android:textColor="#ffffffff" />
</RelativeLayout>
The End! You have made with success the transition between two screens within your app. As an exercise, try adding a third Activity! To complete the example, display in the app a third screen, when the user clicks on the second screen.

Sucess!
.
Trasmitting data between Activities
Now suppose you have a sign-up screen, where you enter your information and then goes to the next screen. Suppose also that we want to capture the information entered in the sign-up Activity and transfer it to the next Activity. More generally, if you want to transfer data from one Activity to another, there is a simple way to do this. See the following code snippet:
String name = "Dragão";
int age = 100;
byte[] random = {99, 104, 97, 109, 97};

Intent nextActivity = new Intent(this, NextActivity.class);
nextActivity.putExtra("my_name", name);
nextActivity.putExtra("my_age", age);
nextActivity.puExtra("random", random);
startActivity(nextActivity);
Data is passed to another Activity through the Intent object that initiates it. What we do is to package the values we wish to transmit within the Intent using the various putExtra() methods, which takes two parameters, a key that identifies the value and the actual value. The key will be used in the next Activity to retrieve what has been transmitted. Look at the code that should be added to the new Activity in order to retrieve the values:
Intent intent = getIntent();
String name = intent.getStringExtra("my_name");
int age = intent.getIntExtra("my_age", 0);
byte[] random = intent.getByteArrayExtra("random");
The getIntent() method retrieves the Intent that started the Activity. Then the getStringExtra() methods, getIntExtra() and getByteArrayExtra() are used with their respective keys to retrieve the values. Note that there is one of these methods for each data type in Java, plus some for widely used classes.
.
So I think we learned something about Activities, such as switching between multiple screens in an Android app and how to transmit data from one Activity to another. Okay, but if everything goes wrong, check out the full code for the app Super Activities on github. You can download the project and import it into Android Studio or even visualize everything on github.
And that’s all for now, folks.


